Installing Fedora Linux
Start from here.
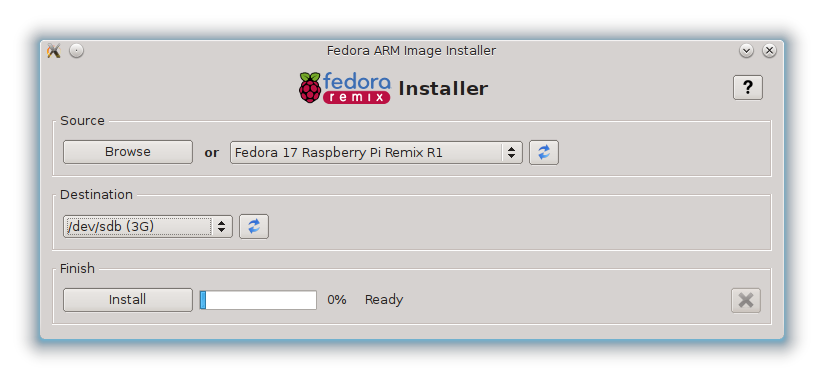
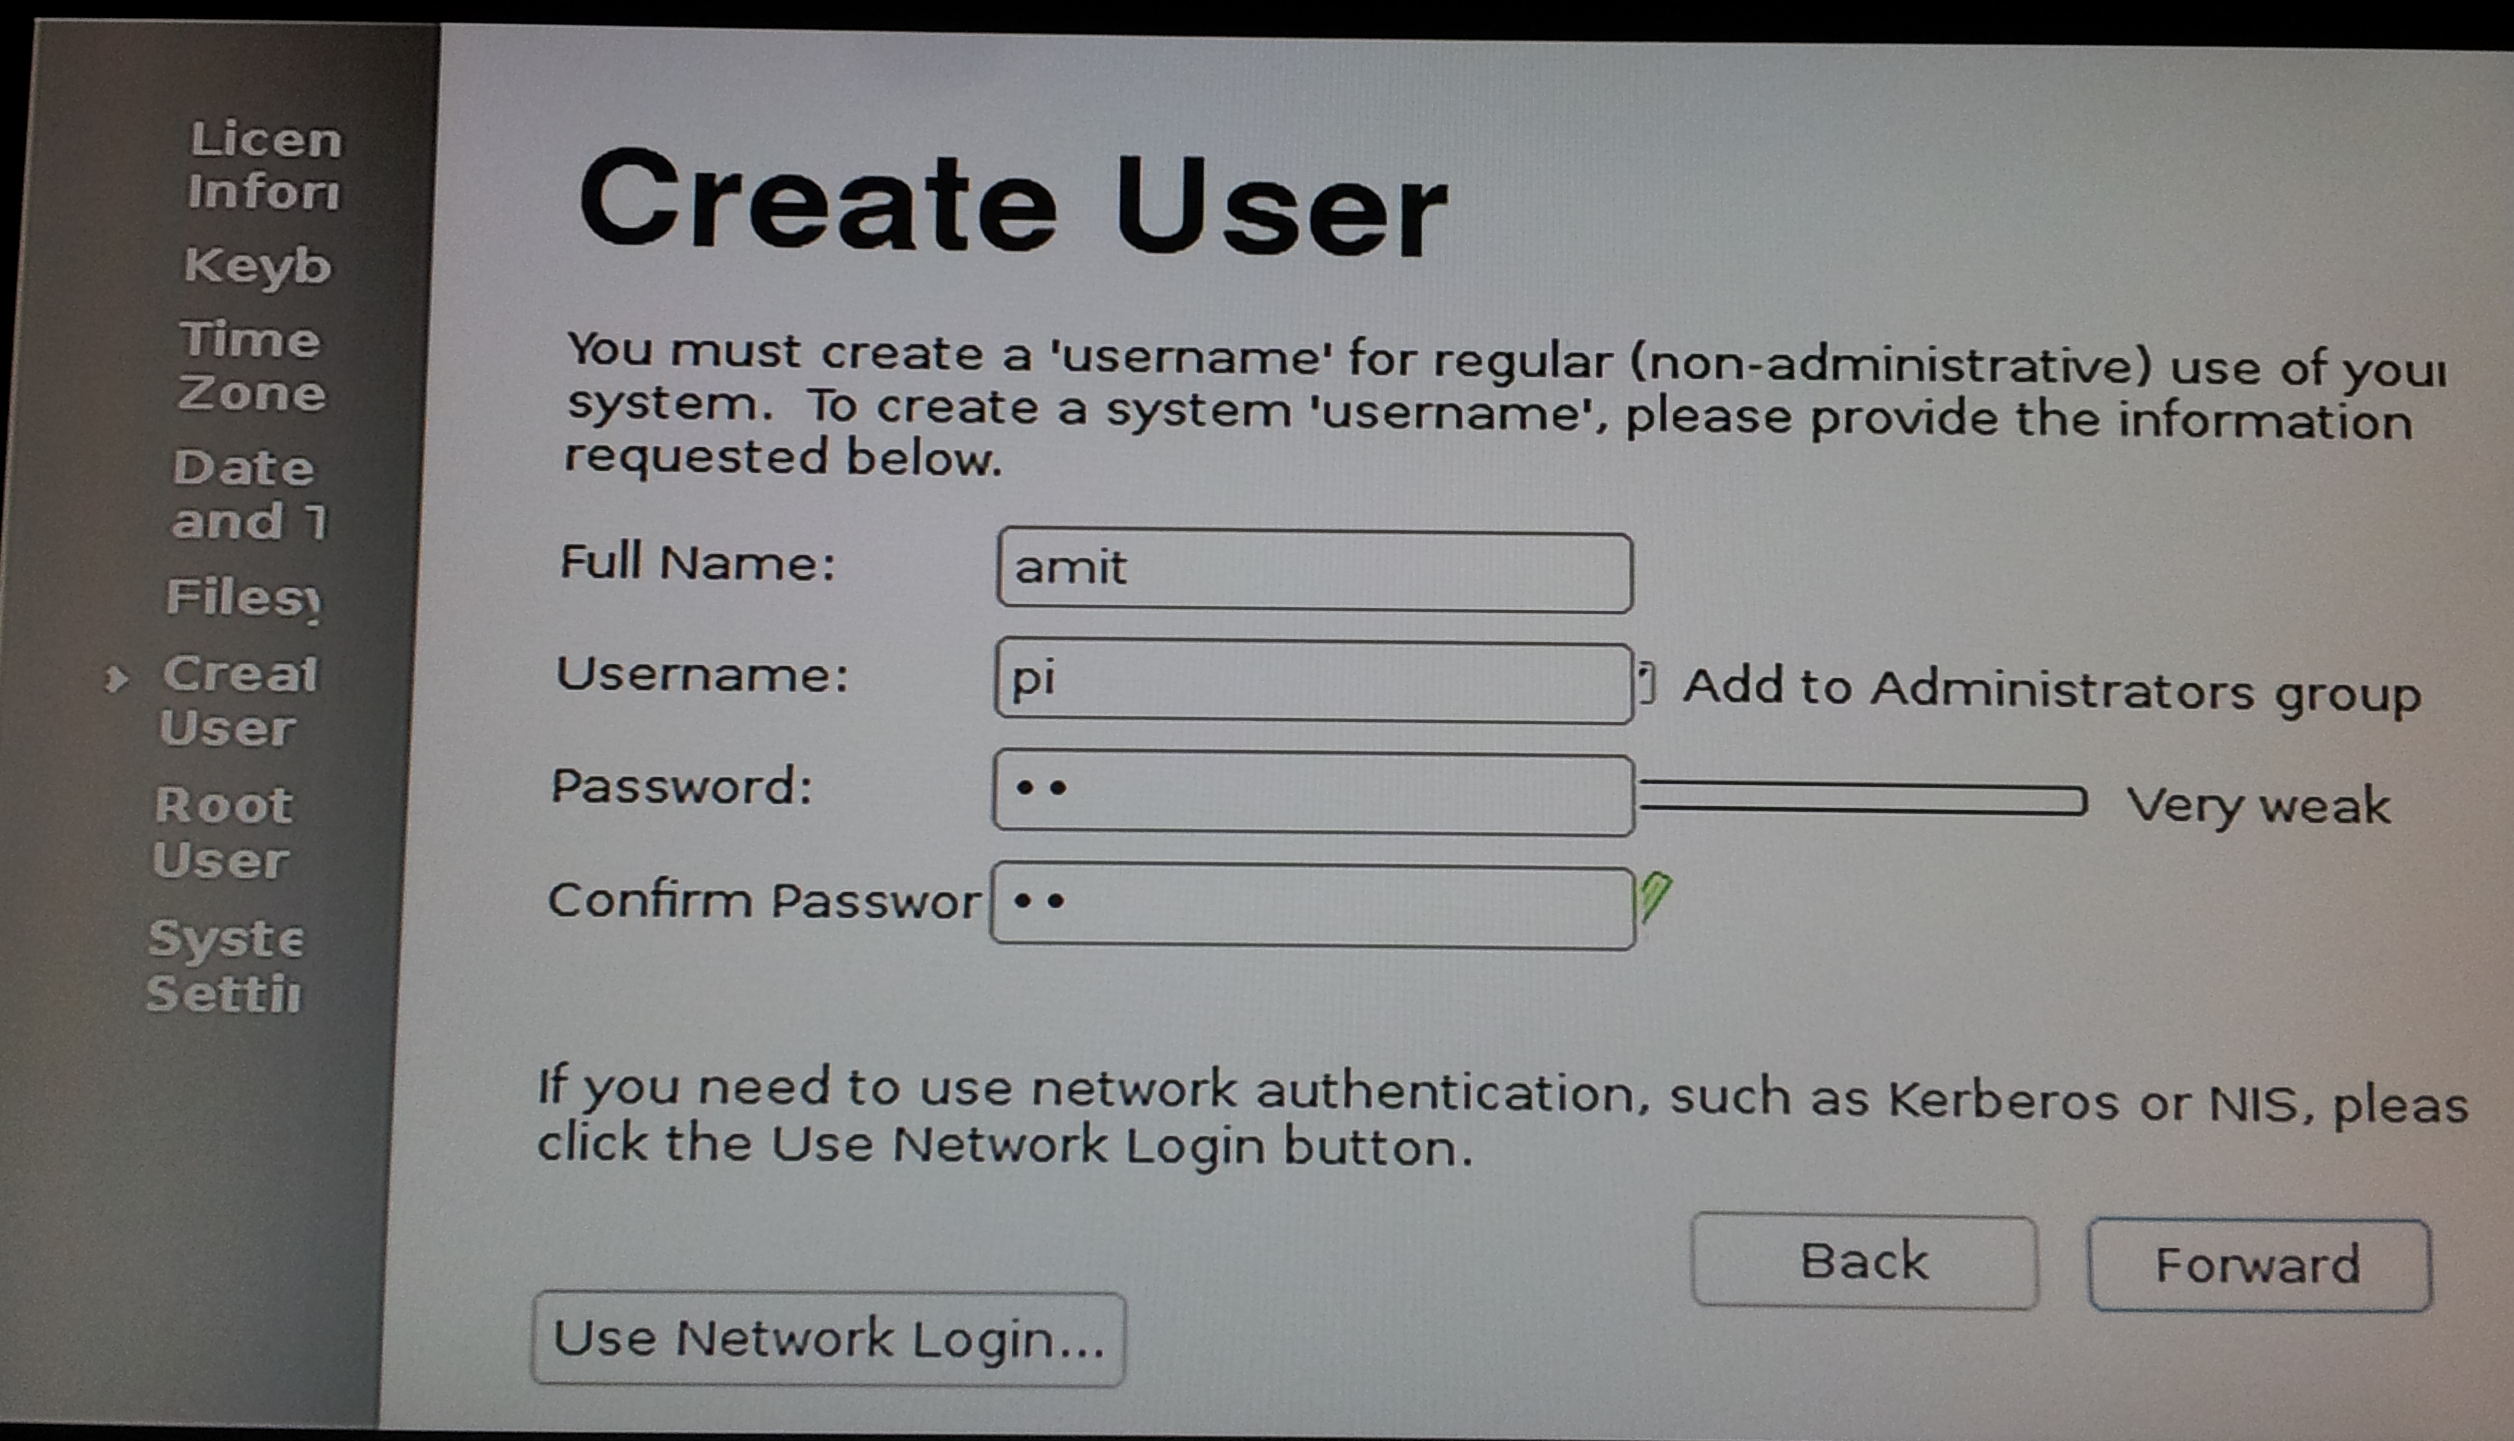
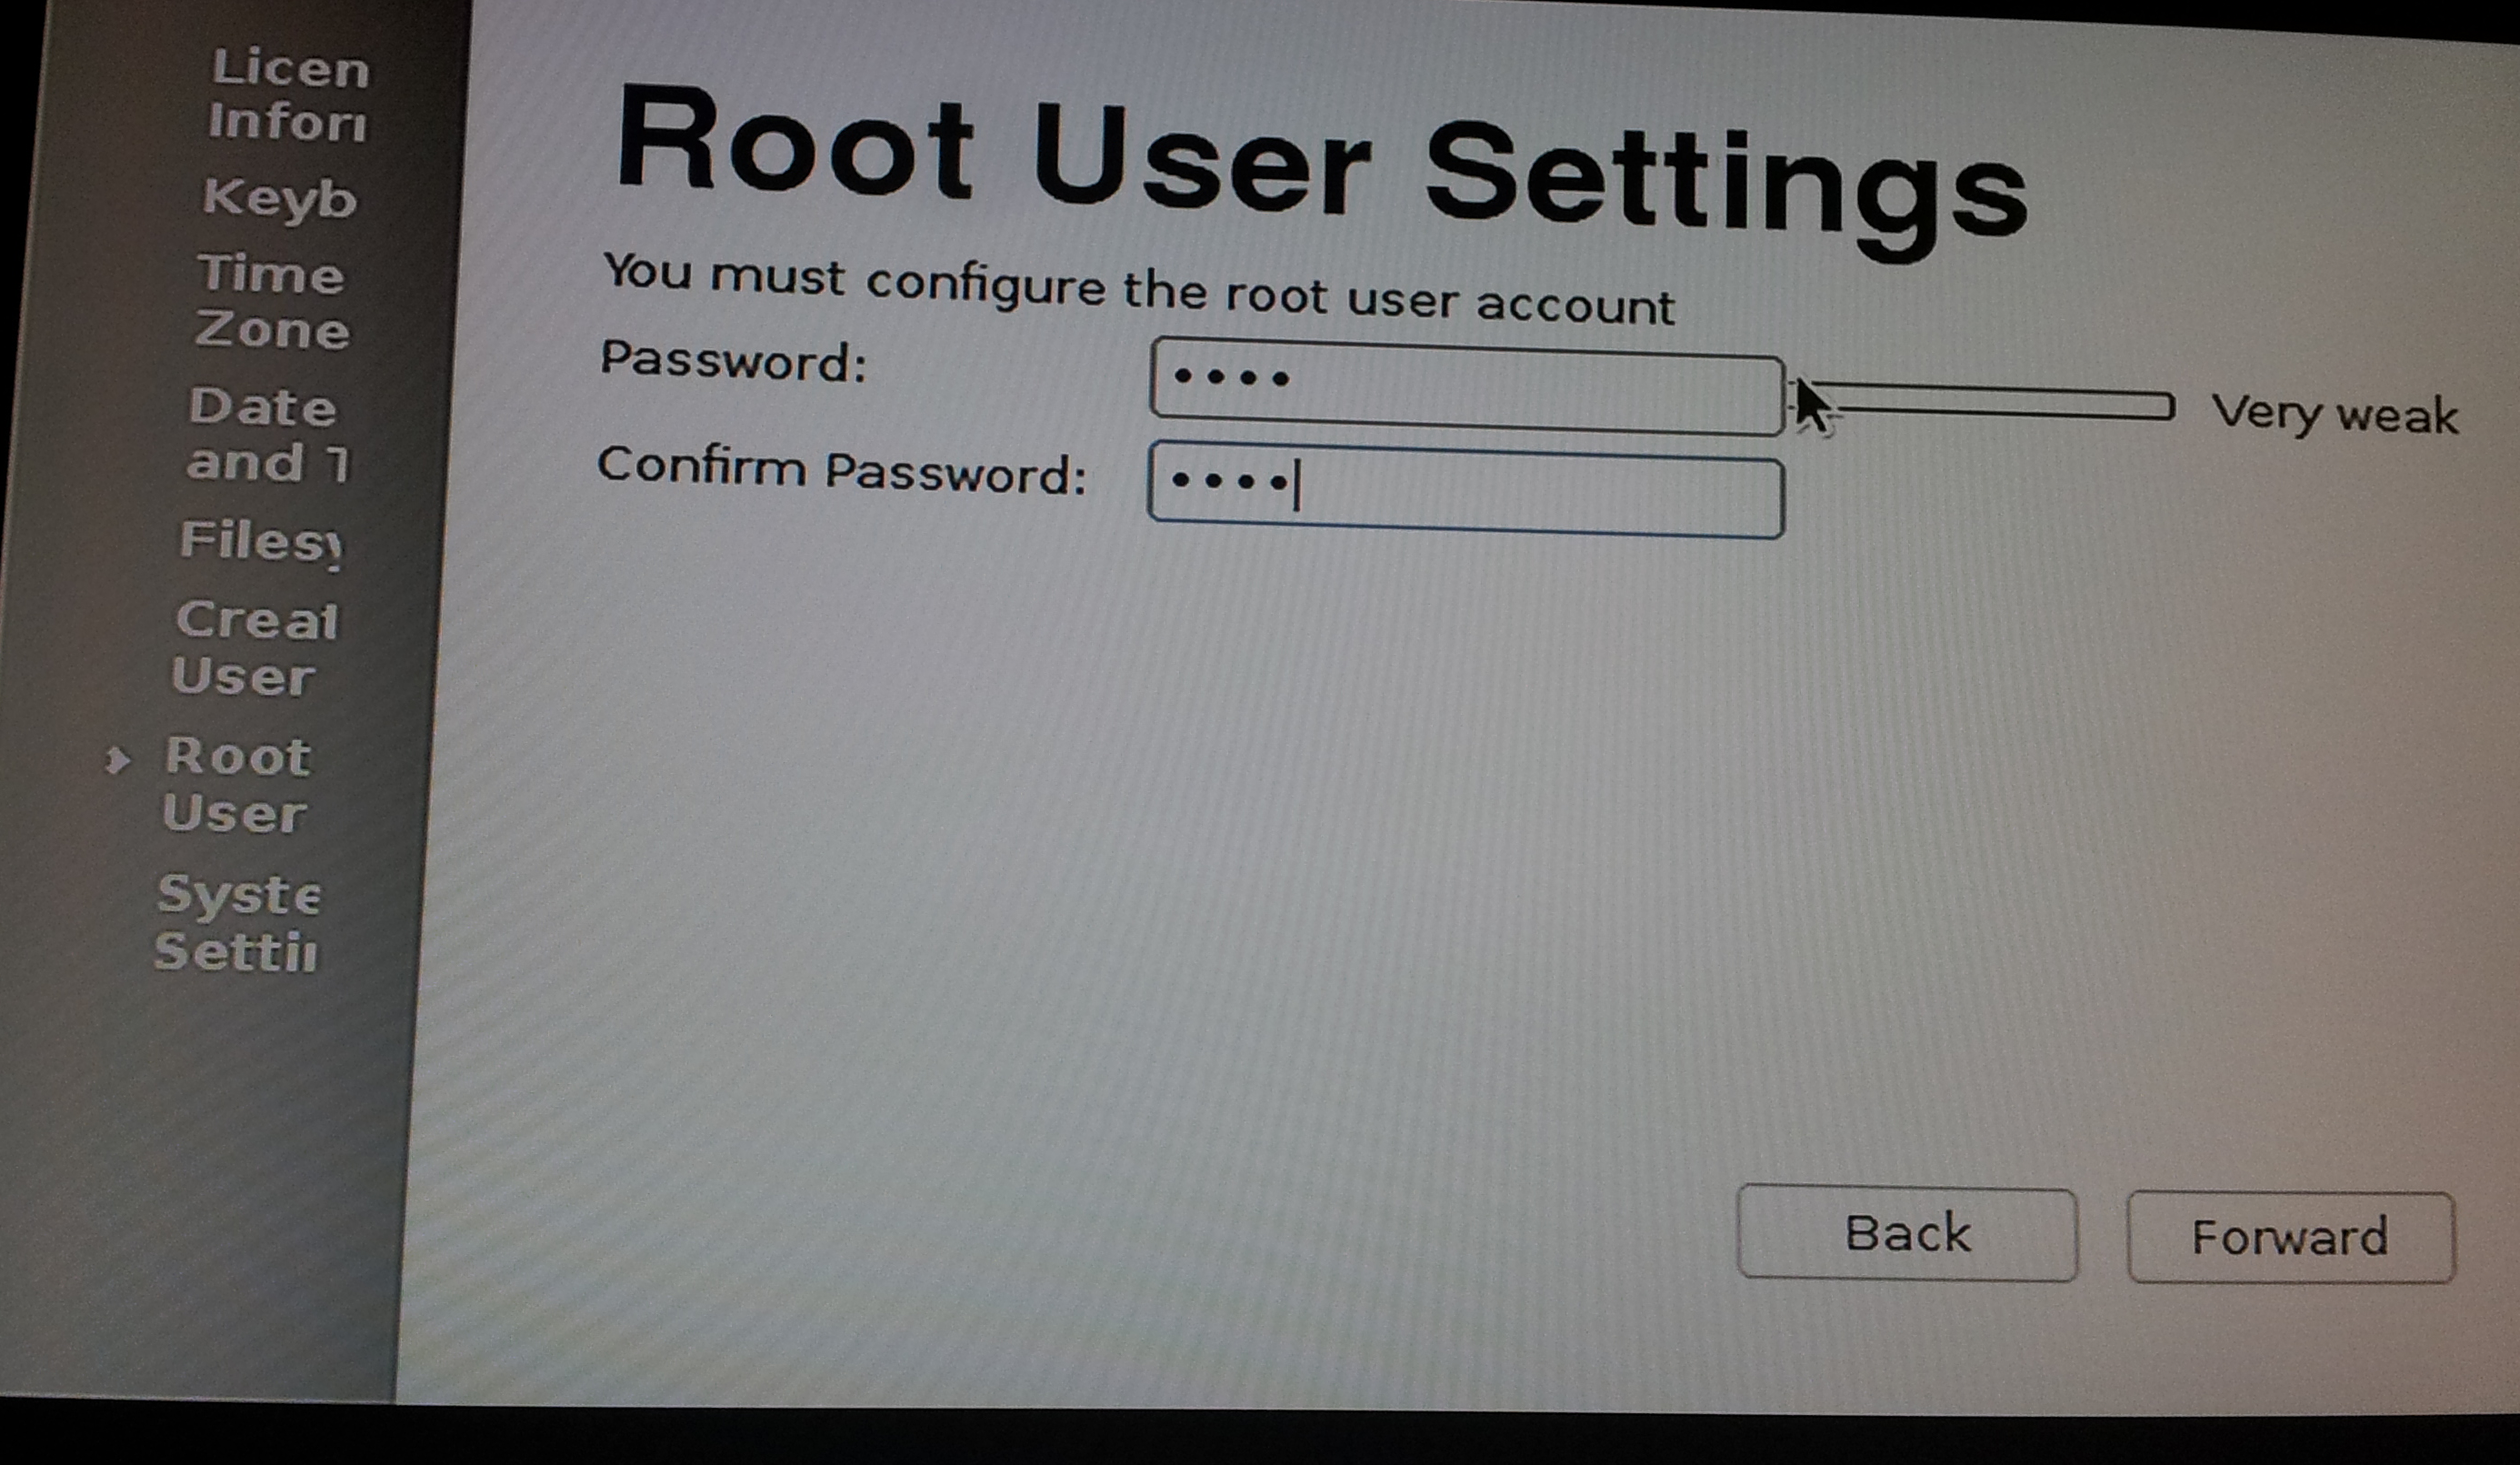
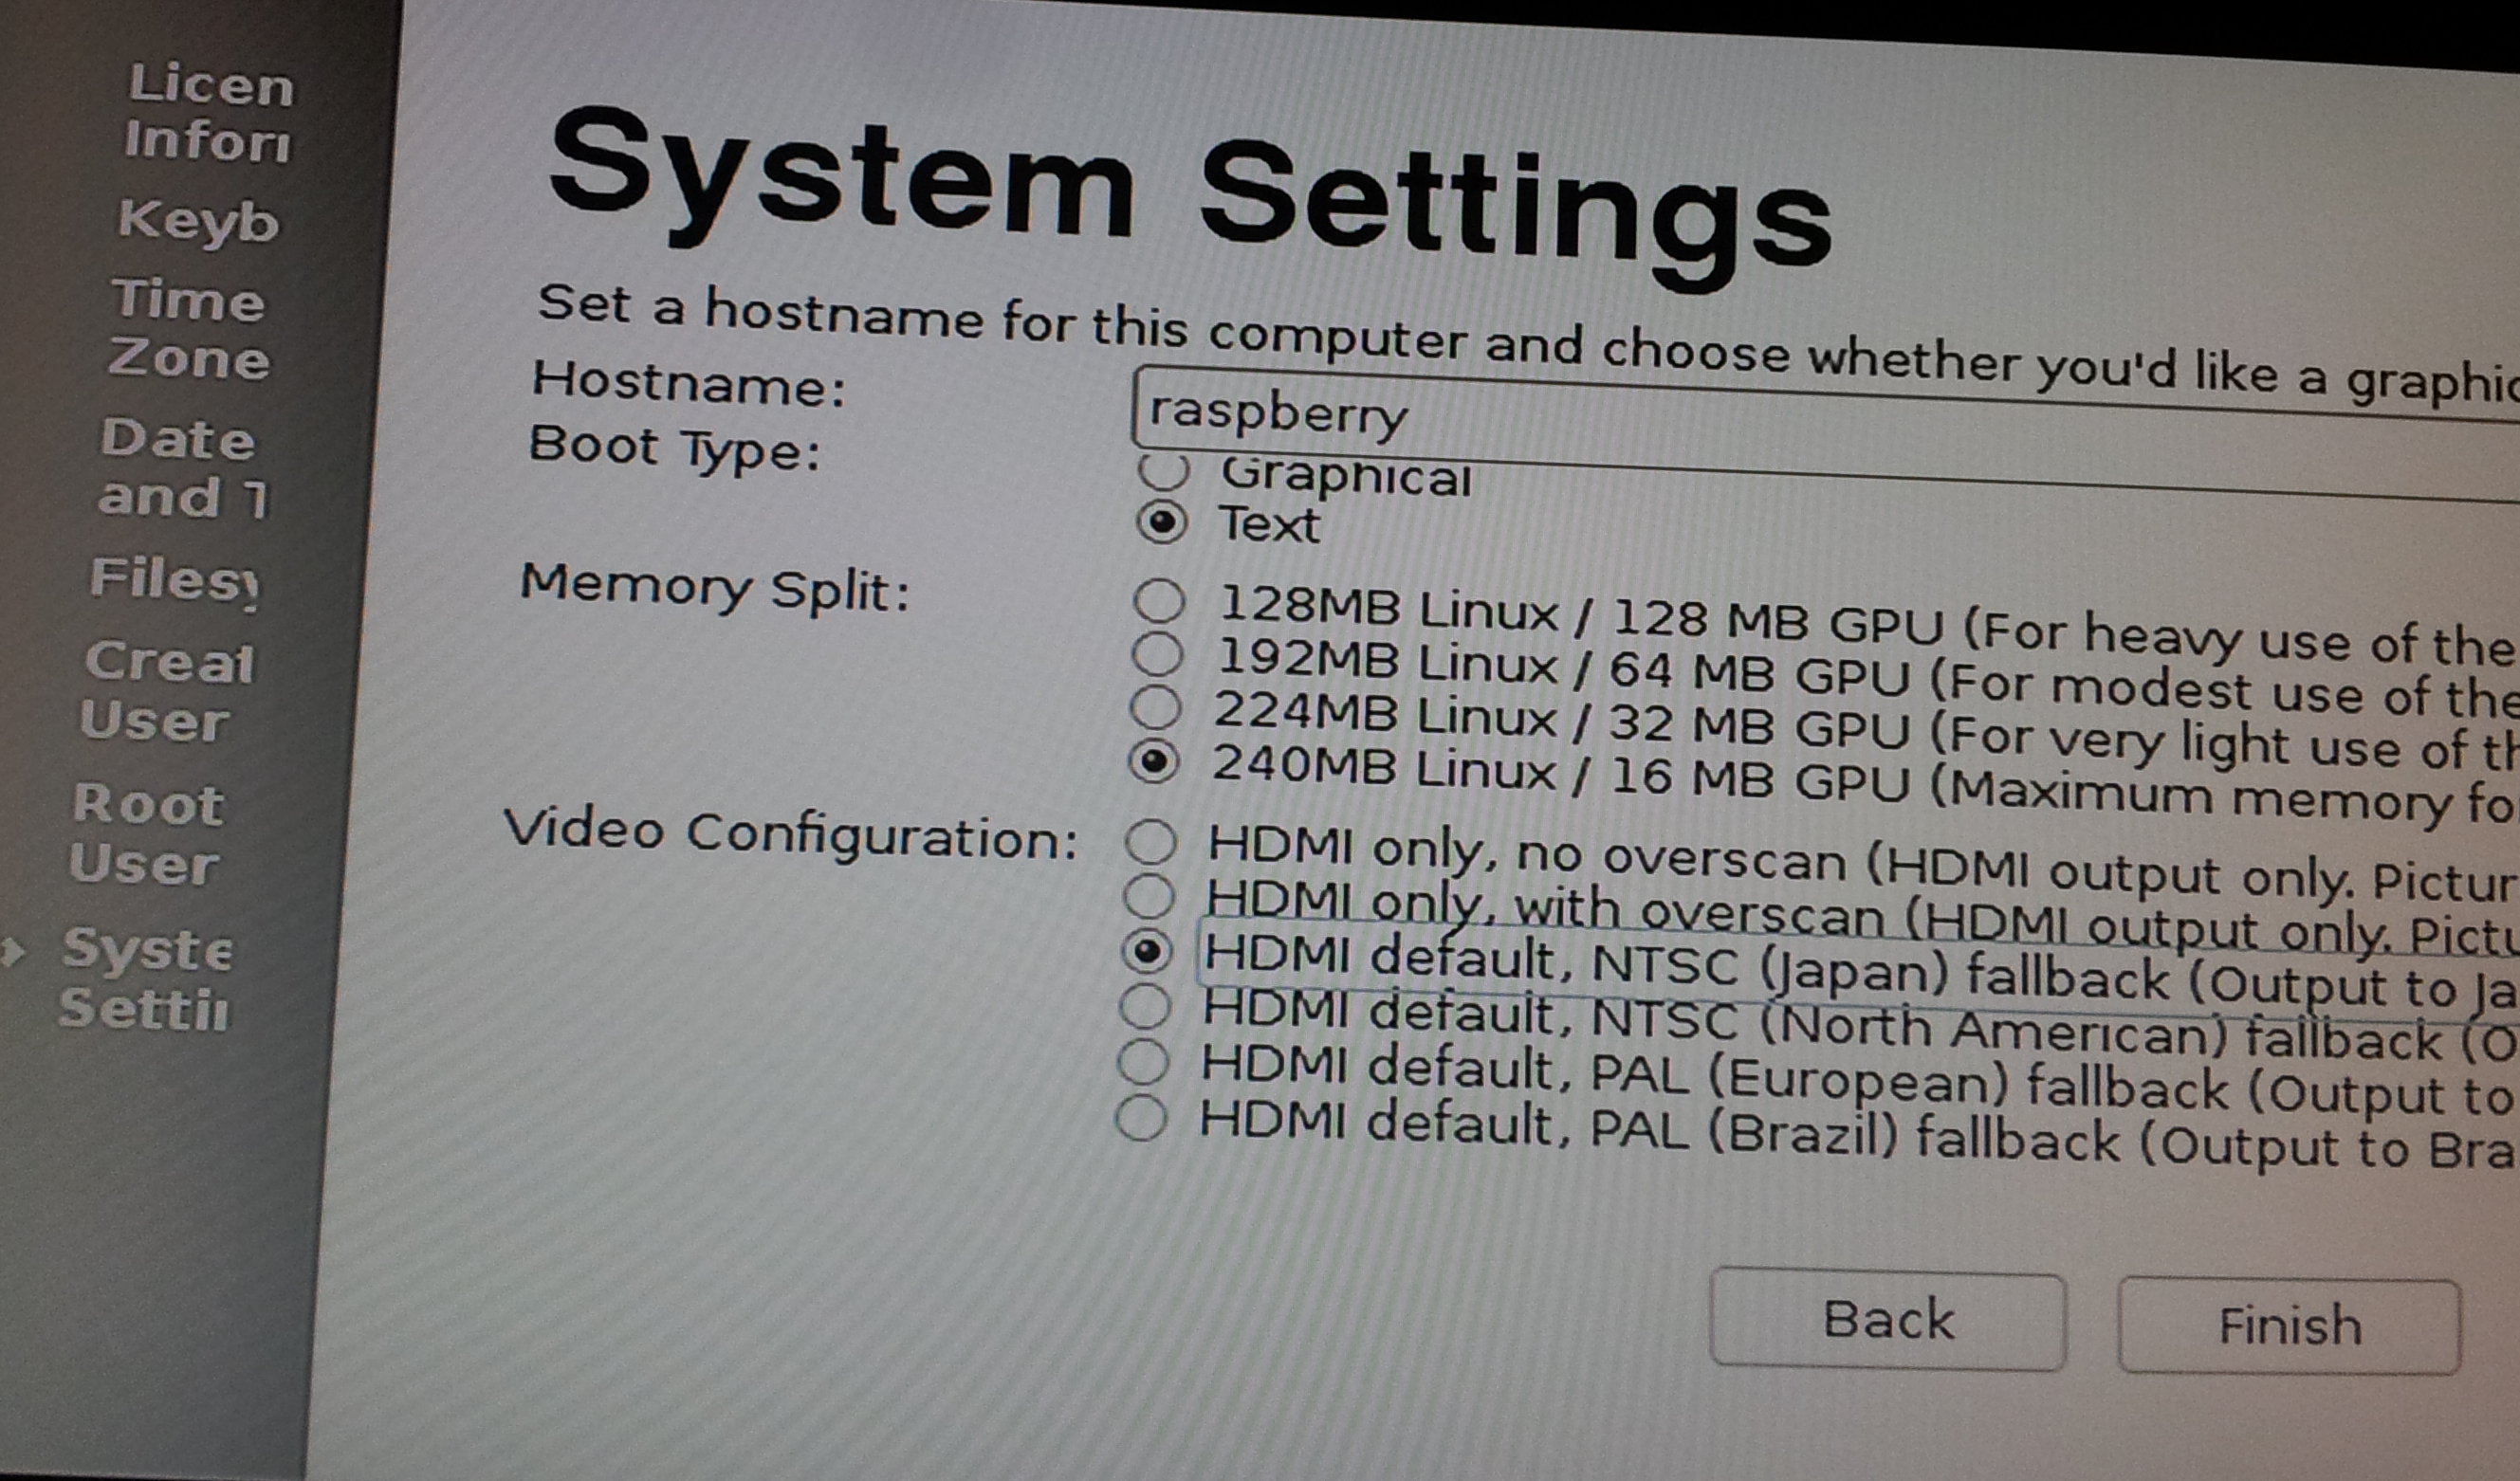
Installer:
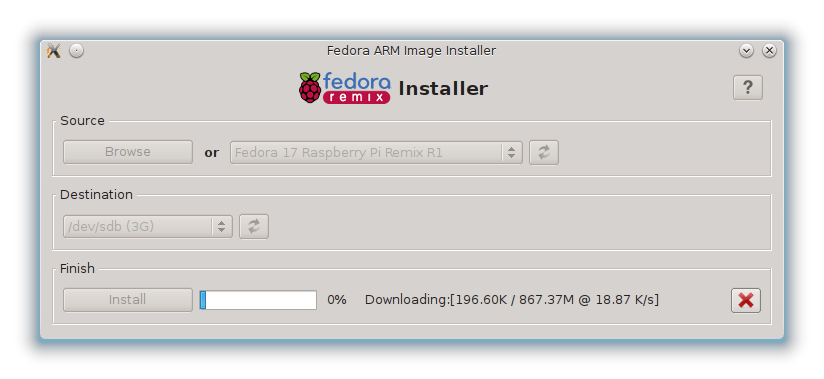
Downloading image:
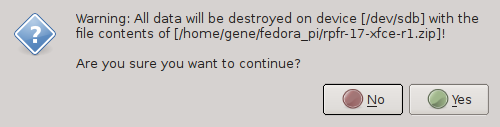
Write to the disk:
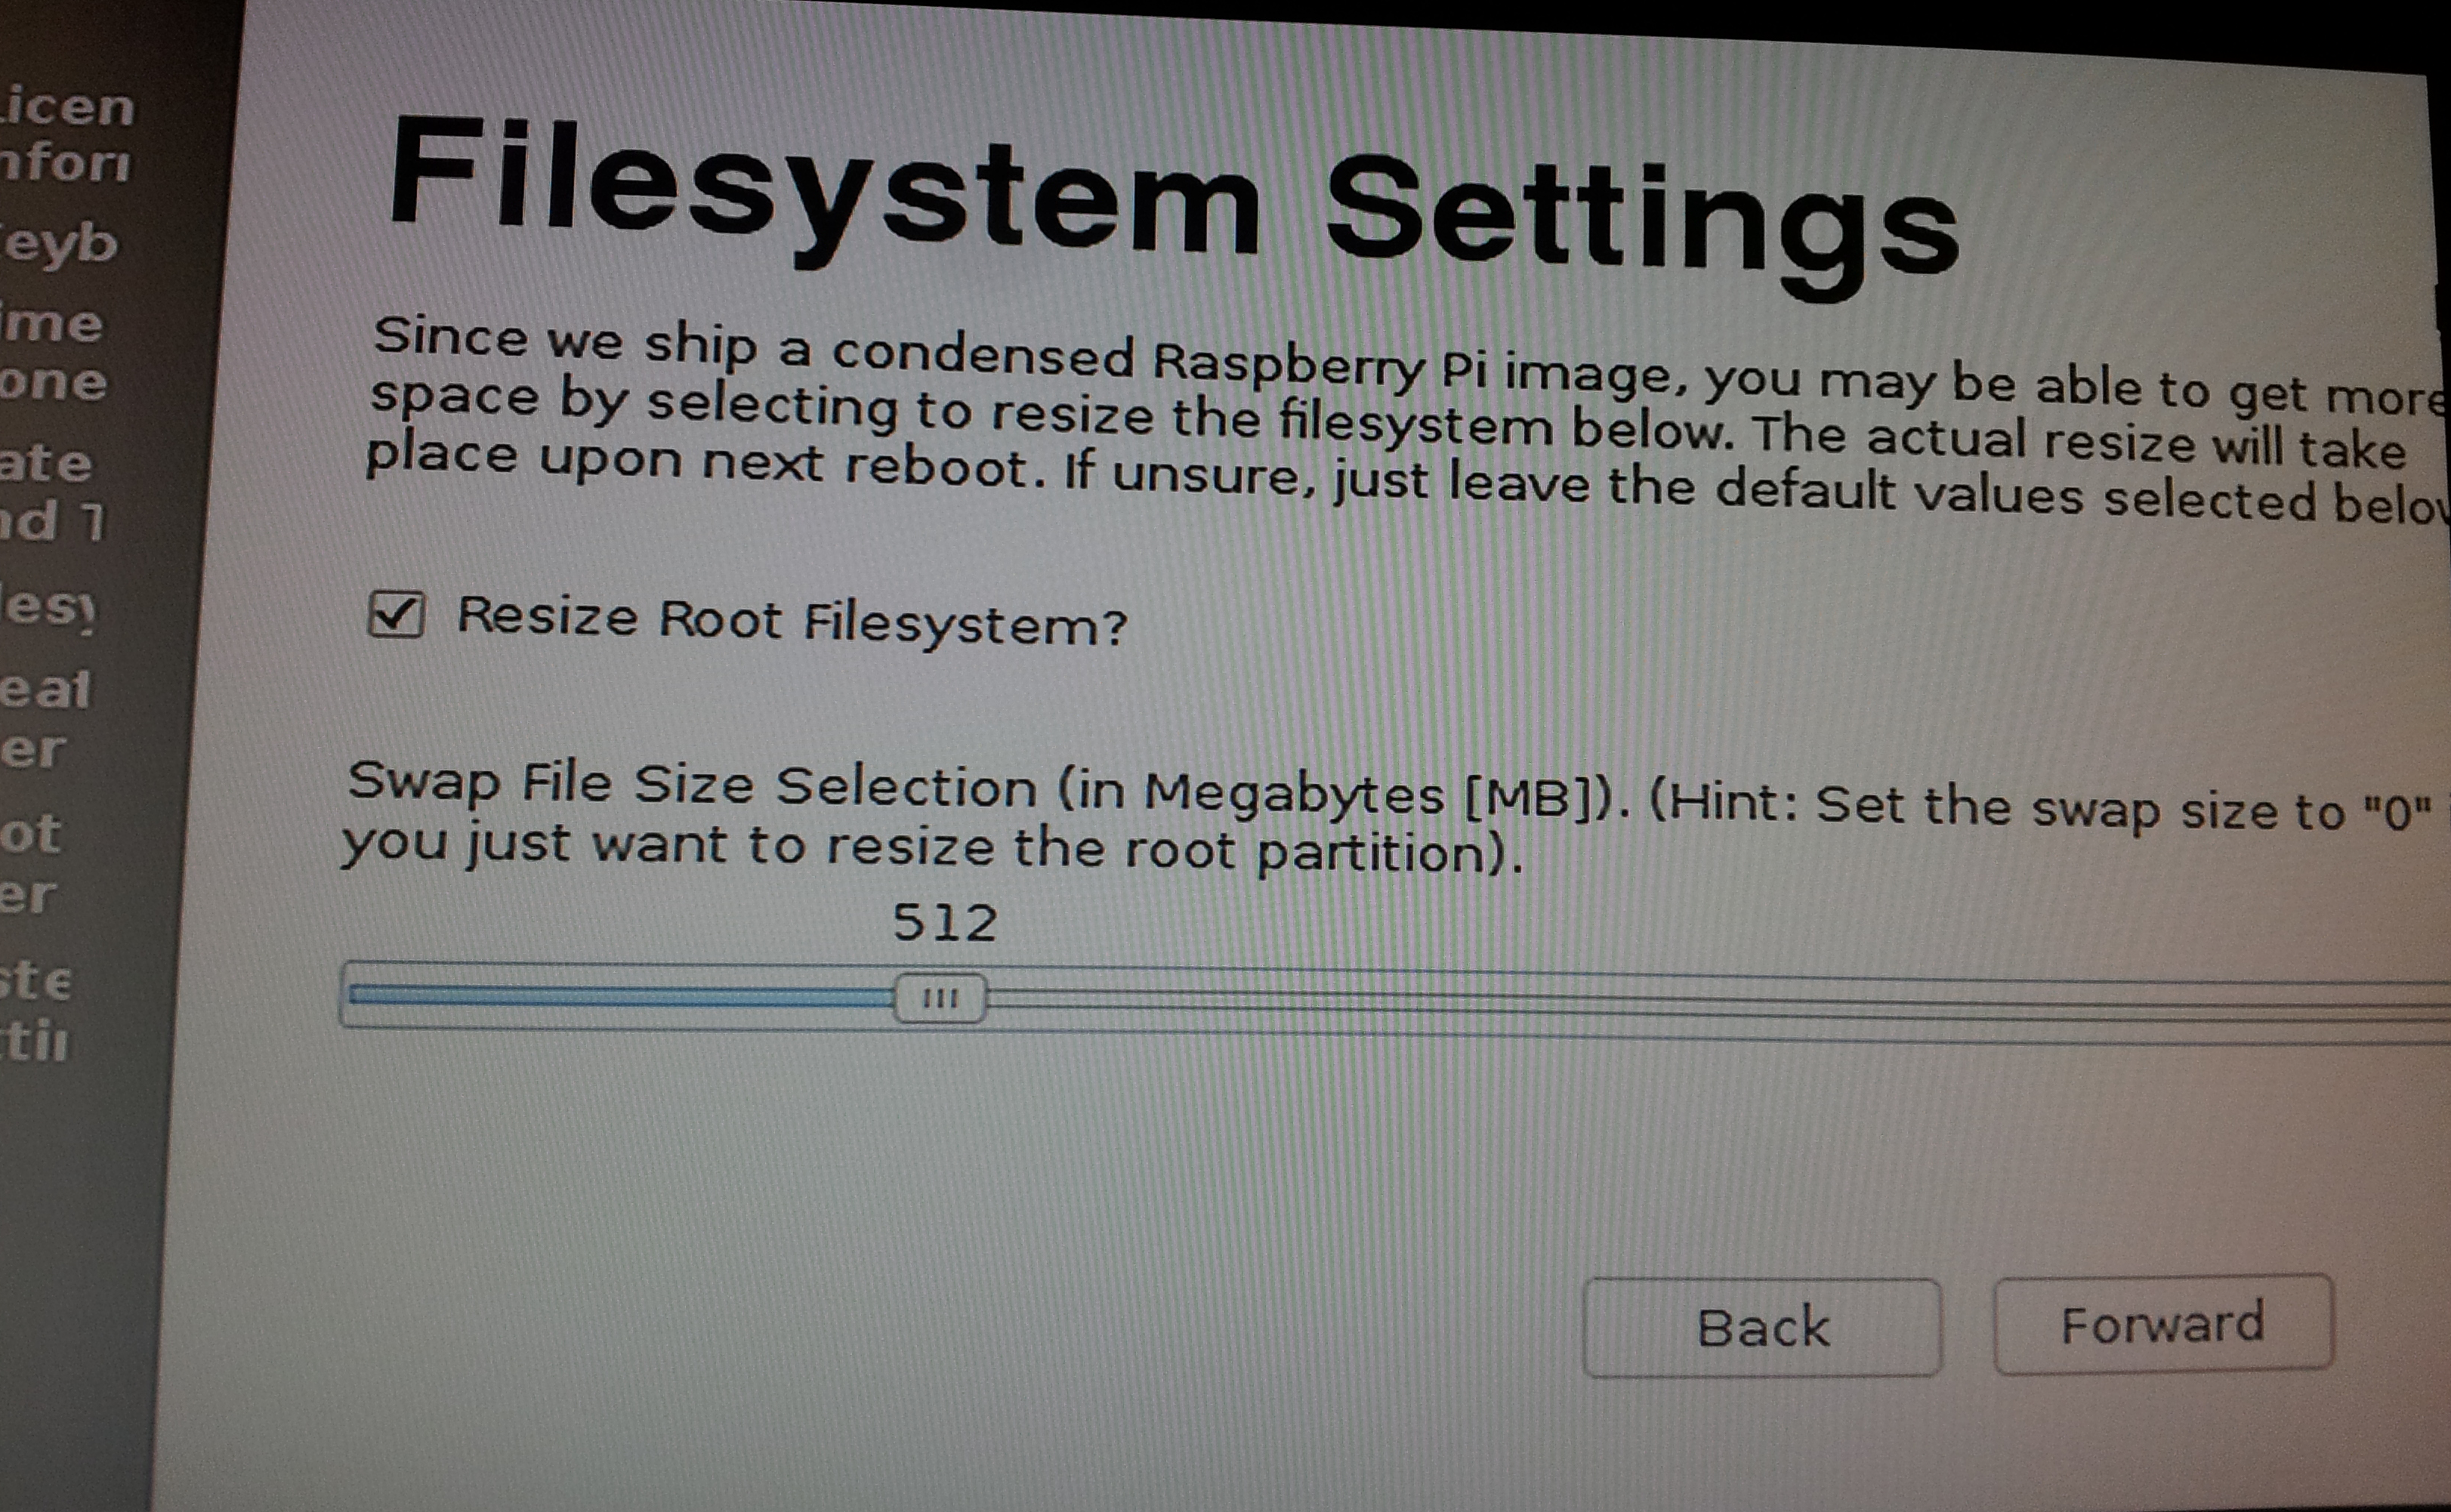
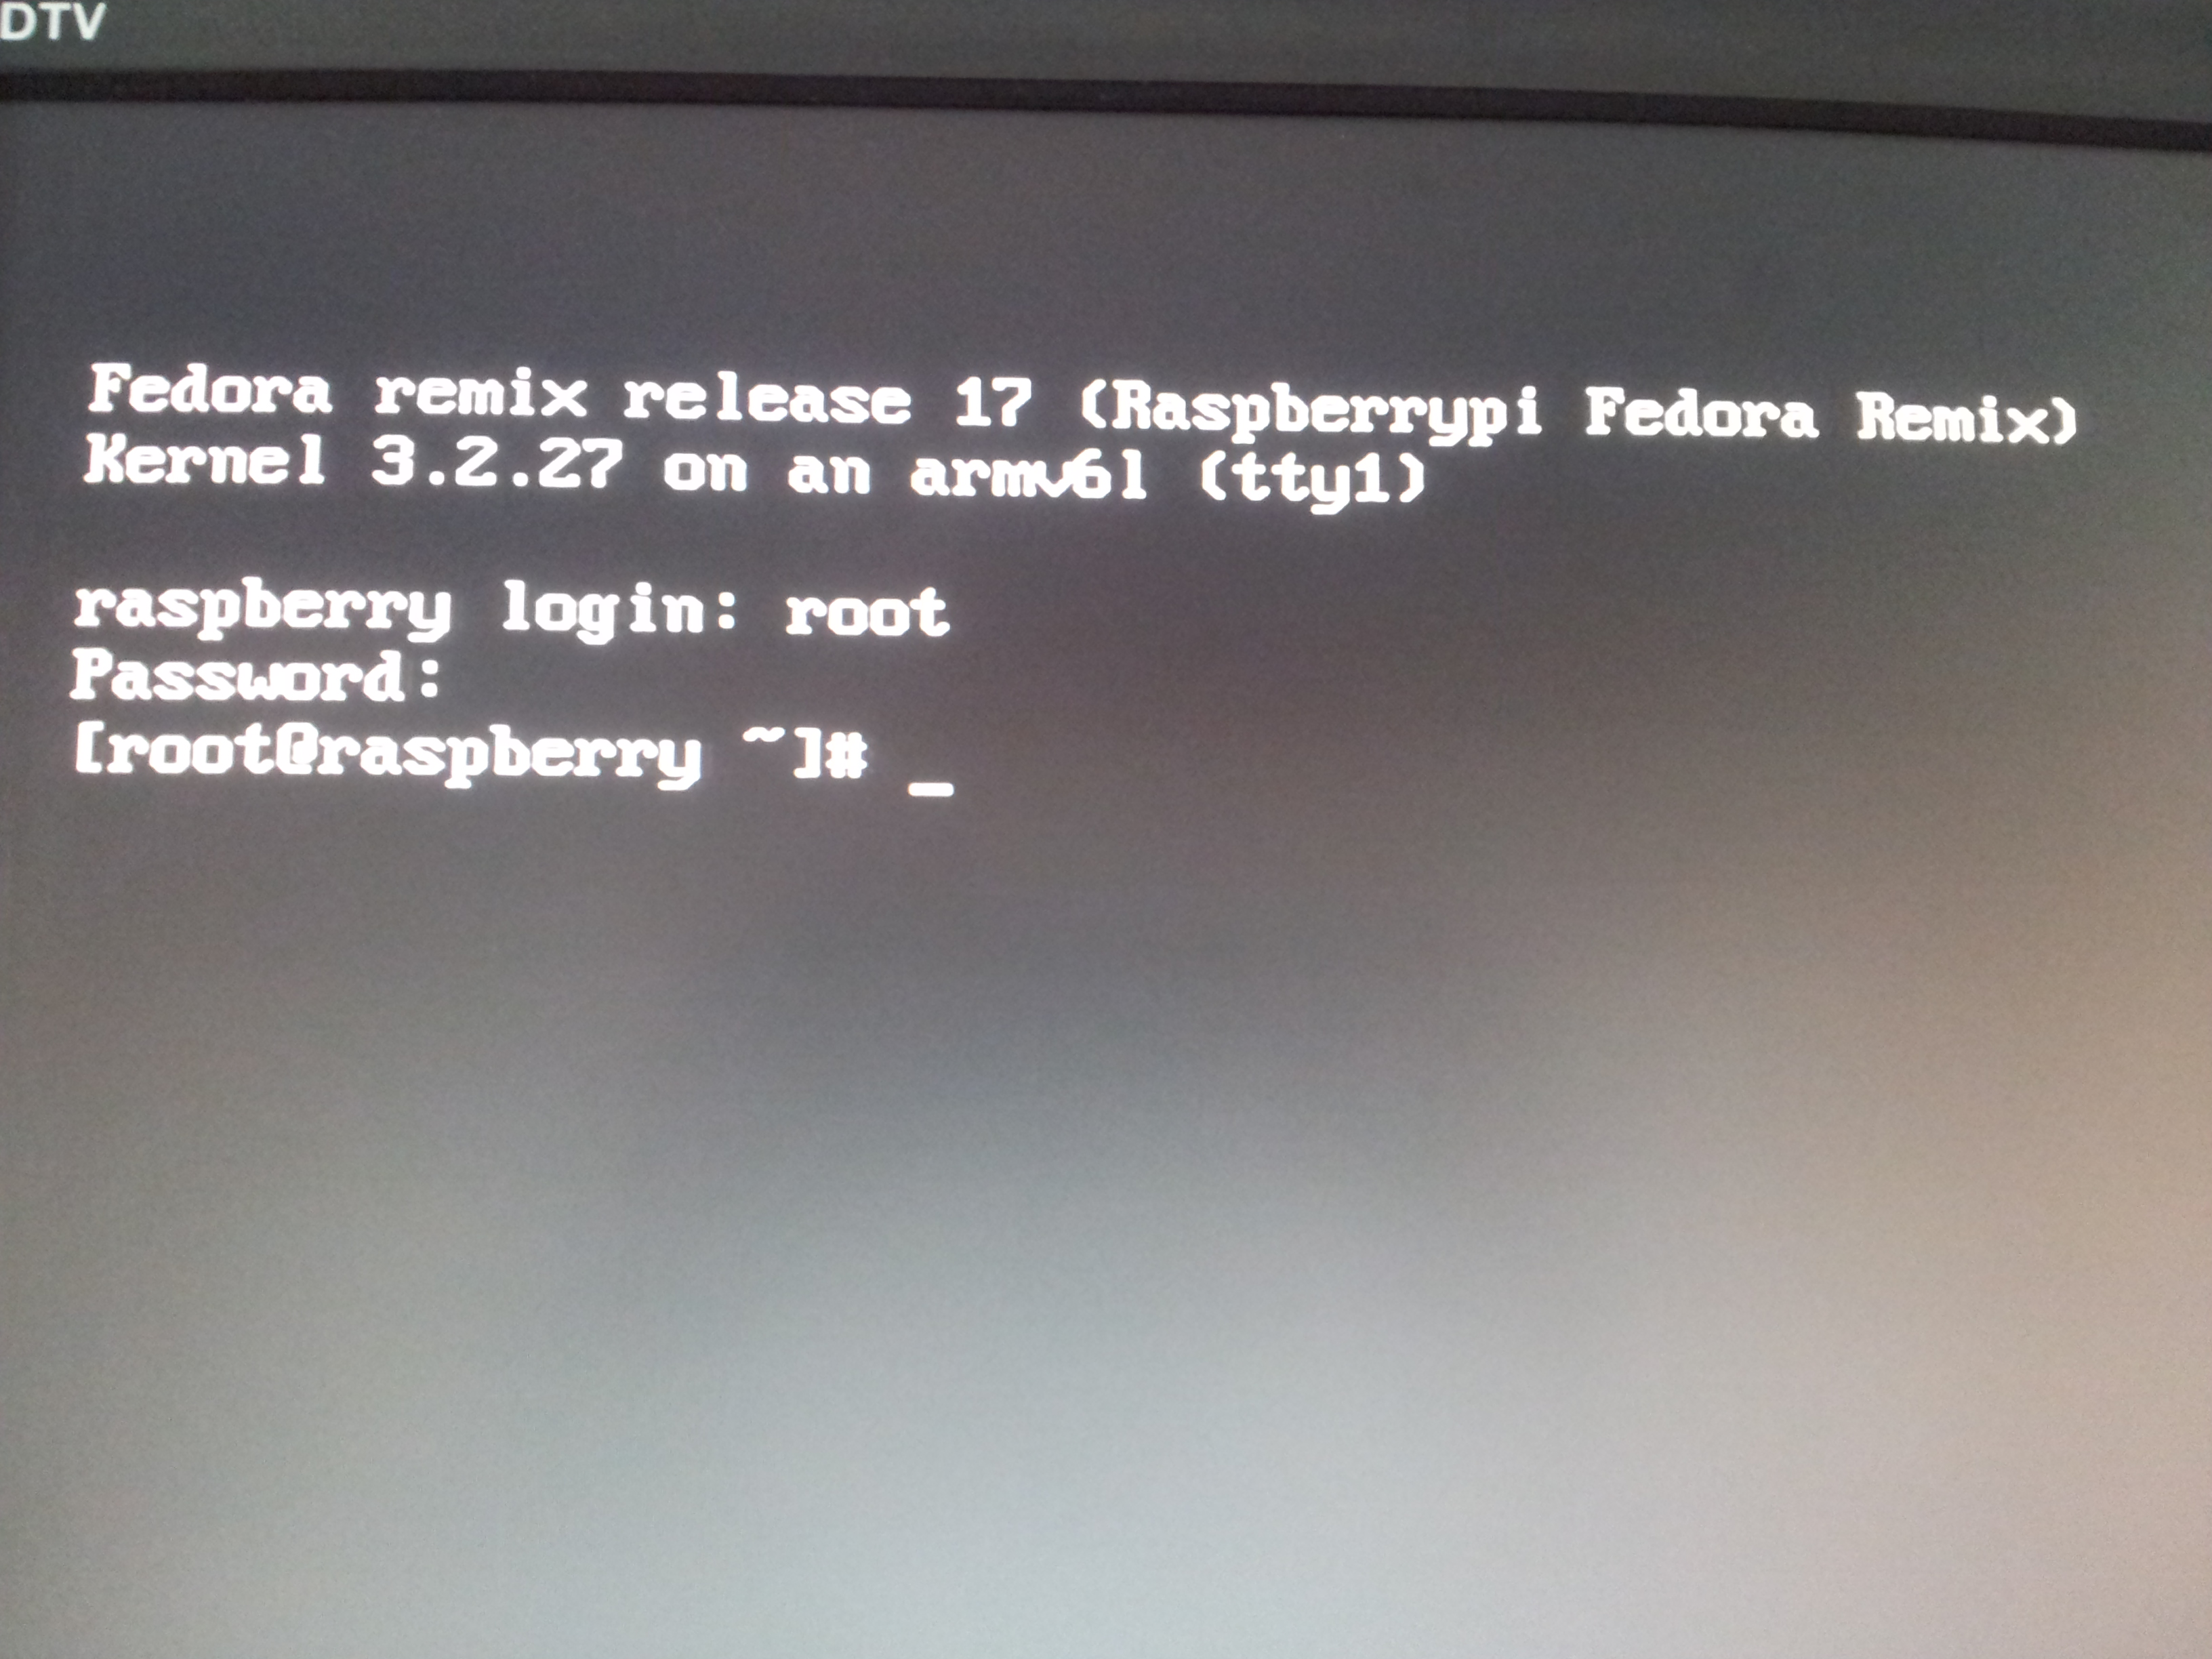
Install complete:

Setting up for remote access
SSH server should already be installed and started in your Fedora installation. To check:
# service sshd status
Redirecting to /bin/systemctl status  sshd.service
sshd.service - OpenSSH server daemon
          Loaded: loaded (/usr/lib/systemd/system/sshd.service; enabled)
          Active: active (running) since Thu, 01 Nov 2012 12:06:23 +1000; 9h ago
      Main PID: 223 (sshd)
        CGroup: name=systemd:/system/sshd.service
              └ 223 /usr/sbin/sshd -D
and then:
# ssh localhost
root@localhost's password:
Last login: Thu Nov  1 21:13:07 2012 from zion.gateway
# who
root     pts/0        2012-11-01 21:13 (zion.gateway)
root     pts/3        2012-11-01 22:07 (localhost)
We are setup for remote login now. So you may now disconnect the TV jack from your Raspberry Pi. The network cable must stay on.
Web-based Access
Using wssh you can SSH into your Pi using a browser. Here’s how. Install the dependencies
# yum -y install python-devel libevent-devel python-setuptools
# pip-python install gevent flask paramiko gevent-websocket wssh
Now, start wsshd
# wsshd
 wsshd/0.1.0 running on 0.0.0.0:5000
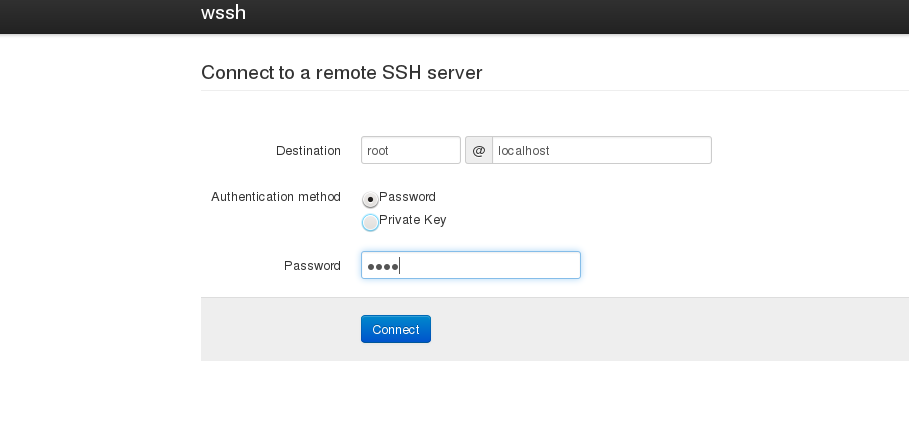
Now, from any other computer on your network, visit the URL, <raspi-ip>:5000 and you will see a login screen where you can enter the username, hostname/IP you want to connect to and use the password/private key authentication to connect to the remote host. Since the wssh daemon is running on your Pi, specifying localhost would mean the Pi itself and use the IP address for any other computer on your network. The login screen looks like this:
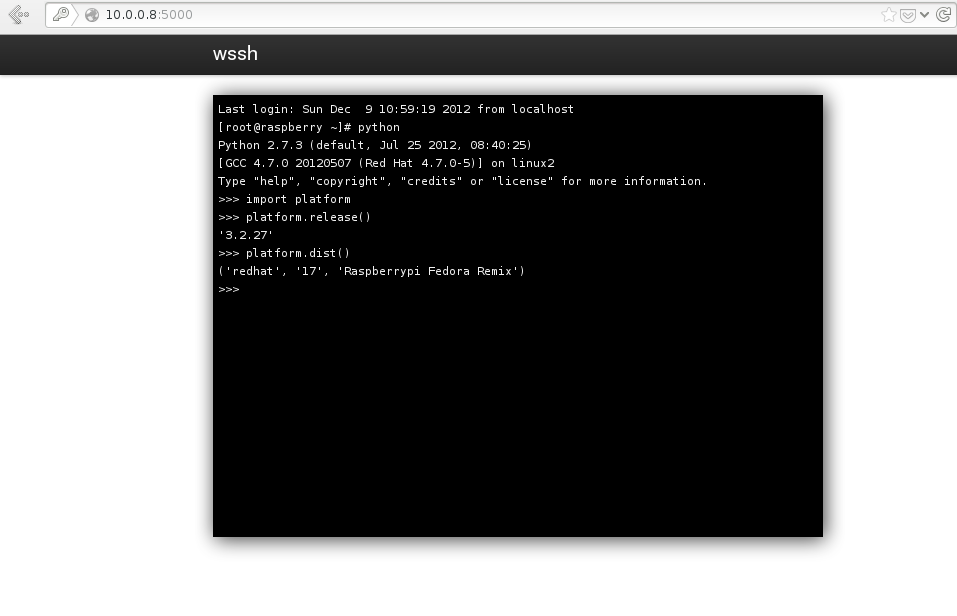
And then you can use the terminal, like you would normally do:
It is a good idea to run wsshd in the background using a daemonizer program like zdaemon (more on this later). Install zdaemon using
# pip-python install zdaemon
Run wsshd using zdaemon
# zdaemon -p wsshd start
. . .
daemon process started, pid=5277
Effectively, this gives you an entry point to your local home network from the Web browser. To make this possible outside your home network and being able to access it from anywhere, literally, you can setup tunelling. You can either play with your router configuration to set up port forwarding or simply use a tunelling service such as PageKite. Install it using
# curl -s https://pagekite.net/pk/ |sudo bash
Before starting to use this service, you should make yourself familiar with the pricing of the service.
Before you can start using the service, you have to sign up using
# pagekite.py --signup
Once you are done with that, you can setup your Pi for exposing the 5000 port using
# pagekite.py 5000 mypi.pagekite.me
And you should have your SSH login screen at your chosen kitename: http://mypi.pagekite.me in this case.
Updating and Adding RPM fusion
Install RPMFusion repositories:
# yum localinstall --nogpgcheck
  http://download1.rpmfusion.org/free/fedora/rpmfusion-free-release-stable.noarch.rpm
  http://download1.rpmfusion.org/nonfree/fedora/rpmfusion-nonfree-release-stable.noarch.rpm
Update system:
# yum -y update
Kernel version:
# uname -r
3.2.27
Time Synchronization
The Pi does not have a real time clock, which means the Pi cannot keep track of time across reboots. The solution is to run the ntpd daemon and use a NTP server to synchronize the time everytime you reboot.
Install the ntpd and ntpdate utilities:
# yum -y install ntp ntpddate
Although, the default NTP servers works, you may want to edit the /etc/ntp.conf to include NTP servers closer to your geographic location.
And start the ntp service
# service ntp start
The date and time should now be reflected to be your local time. To start the ntp service on boot
# chkconfig ntpd on
You will see that few seconds after the boot, the time is always set to the local time.
If you have the need to add one, see Adafruit’s tutorial.